Appearance
Product Preparation Guide
General Information
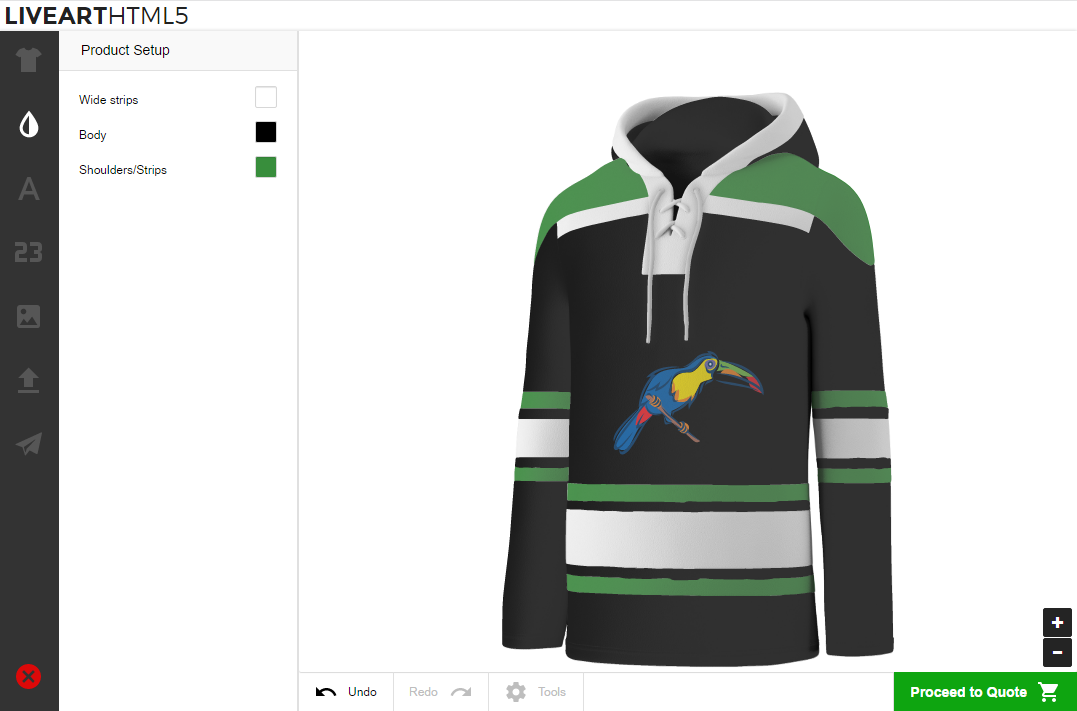
LiveArt is a versatile design tool that works with almost any type of product your business offers. These products can fall into two categories: resizable (such as signs, banners, and stickers) or non-resizable (like apparel, promotional items, and uniforms). Additionally, products can be either colorizable or non-colorizable. Colorizable products can further be categorized as multicolored (such as uniforms and socks) or single-colored (like t-shirts). Any of this variety is set with the help of assets (graphical file of product and its thumbnail).
Product Assets Preparation
Product Images
Non-resizable products could be t-shirts, mugs, caps or any product that has a fixed and non-resizable background. You may use PNG, GIF, JPG or SVG images for such products.
Resizable products could be signs, banners, stickers or any product that has resizable background. If you use Standalone or Shopify version of LiveArt, you do not need to prepare product images as they have predefined locations in the admin area. If you use WooCommerce, you may use SVG images.
The products may also contain masks. This is in particular useful for irregularly shaped products like phone wraps, where you'd like design to be shown behind the wrap shape or to add additional texture for your product (e.g. distress effect or 3D realisitc look). Masks can also be SVG or PNG (best for transparency) and sizes same as the product. When LiveArt is loaded with product and mask image, the mask will be on the top of the product image.
Thumbnails
We recommend to use rater image for product thumbnail which will be shown in the product catalog. Recommended dimensions are 110x110 pixels.
Preparation of Colorizable Products
For single-colored product you can use both raster and vector graphics (SVG). When using raster images, you should prepare separate file for each color-location pair (e.g. for t-shirt: green front side, green back side, white front side, white back side).
For multicolor colorizable products only vector graphics (SVG) can be used.
You can prepare colorizable product images from any vector images like EPS or SVG from Illustartor or CorelDraw.
TIP
Due to recent changes in Adobe Illustrator's SVG export format (starting from version 28.4), we recommend avoiding the use of Illustrator versions 28.4 and newer for multicolor SVG image preparation. These versions introduce issues with IDs that affect the compatibility with LiveArt Designer.
Please use Adobe Illustrator versions older than 28.4 until further notice. We are actively working on a more robust solution to handle these changes in future updates.
Please see the detailed coloriable product preparation guide below:
General Recommendations
- 💡 When saving your product in editor, save it with CSS Properties set to
Presentation Attributeson svg export dialog (examples: in Illustrator, in Corel). - Make sure your vector data is optimized, does not contain:
- any hidden elements;
- any referred external images;
- any extra namespaces like RDF, sodipodi etc;
- any clip-paths inside that may conflict with other elements on LiveArt stage.
- Make sure that your svg contains
widthandheightattributes. - 💡When saving your product, turn off
Preserve Illustrator Editing Capabilitiesoption so that your SVG file size is smaller (examples: in Illustrator). - Use https://jakearchibald.github.io/svgomg/ utility to prettify and clean up your SVG.
Preparation of Colorizable Product Images
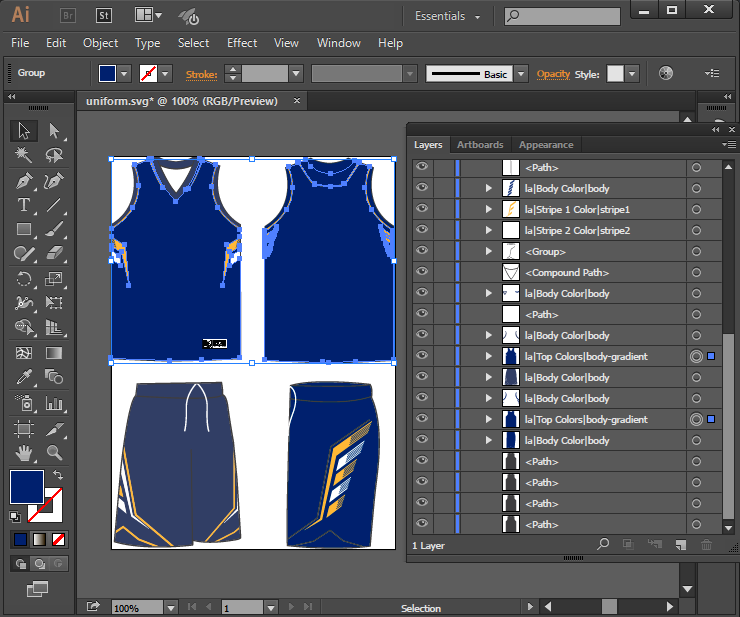
To make your product colorizable, name each layer that you want to be colorizable using a specific naming convention recognized by LiveArt.
💡We will use this SVG product sample in the guide so you can download it and verify your results in the end.
Use Special Layer Names
Open your graphics in graphics editor and name all layers to colorize with a special layer name syntax: la|Layer Name or la|Layer Name|group.
For example, la|Collar|collar. Please see example in Illustrator.
TIP
Here is the explanation of the syntax:
la- special prefix that allow LiveArt to recognize the layer;|- special separator (Note: will be exported to SVG as UTF code_x7C_);Layer Name- layer name that will be visible for the customer in designer during colorization (example);group(optional) - layer group.
- Use groups:
- to colorize independent areas at the same time;
- to colorize the same area on product different locations (see example: front location, back location, colorize in the designer);
- Note: If layers from the same group have different
Layer Name, on UI layer name will be the same as the highest (in the layers list) layer name in Illustrator has.
- 💡 When saving your graphics in editor, save it with CSS Properties set to
Presentation Attributeson svg export dialog (examples: in Illustrator, in Corel). Please see how layers will look on exported to SVG sample.
TIP
- What is colorizable:
- All kinds of paths with solid color (Note: in groups the first (lowest) object with fill will be used as a source. This fill will be applied to all objects inside the group).
- What can not be colorizable in Illustrator:
- Clip paths.
Gradients Support
All kinds of paths with a gradient (each gradient stop - as a separate color) are colorizable. Suppose there is a prepared multicolor product with solid colors. All layers to colorize should be named with a special layer name syntax.
To add gradients:
Select needed layers (i.e. la|Top Color|body-gradient)
Add gradient:
Gradient areas will have separate color picker for each gradient color in the designer: 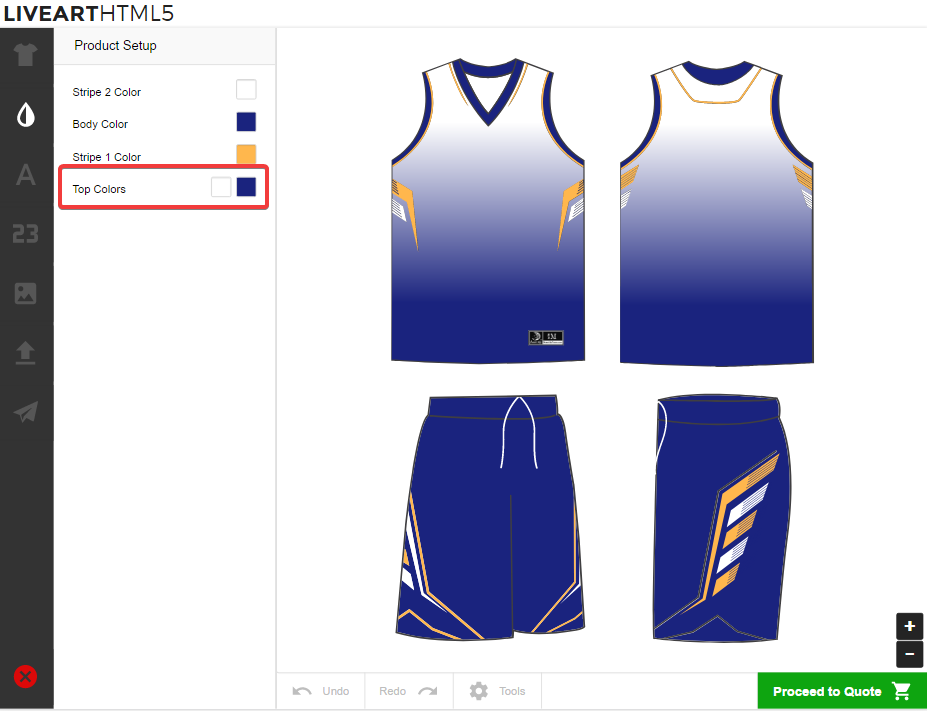
SVG Gradient Limitations:
Glossary:

F. Midpoints
G. Color Stop
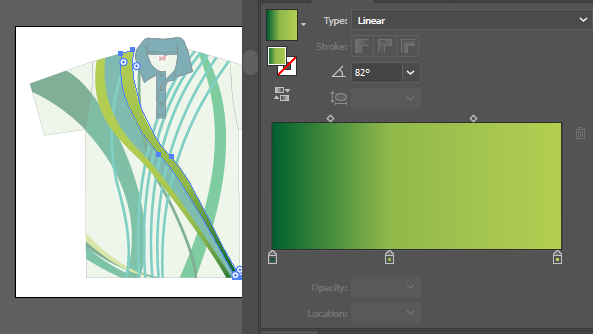
Illustrator supports midpoints, SVG supports only stops.
Example of the export issue
See an example of a product with a gradient with a midpoint that is not at 50% in Illustrator: 
Exported in SVG (1.1 Base):
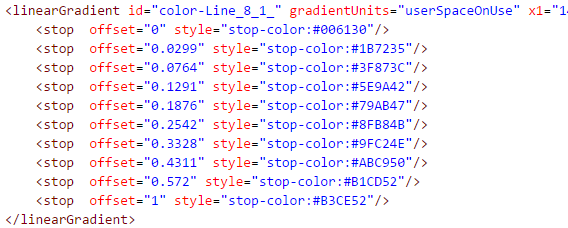
If you open it again in Illustrator: 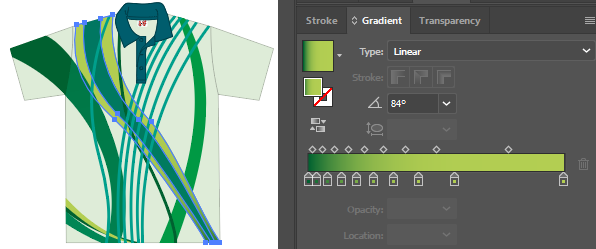
Solution
In the case of non-centered (default) midpoints, additional edit is required. in Illustrator:
- Optional: add more stop point(s) to replace the non-center midpoint.
- Obligatory: set all midpoints to 50%.
Product Mask Image
The products may also contain masks. You may consider using a mask in the following cases:
- You need the user's design to be limited to some non-rectangular shape (i.e. phone wraps) or partly hidden under some functional parts as it will be on the final product (i.e under buttons or zipper).
- You want to put some texture on the design to make it look more natural (i.e. add shadows to apparel products to show their natural form and texture).
Mask Limitations:
- Mask can be SVG or PNG (best for transparency).
- Mask should be the same size as the product.
- Mask cannot be colorized.
- This type of mask cannot be used for resizable products.
How Mask Works
Mask is placed as an upper layer above the design layer. Its transparent or semi-transparent parts work as a window through which the design is seen by the user.
Example #1: Limit design to some irregular shape and hide partly under functional parts.
In this example, product image is an SVG file with a rectangle. It is used for colorizing the background of the phone cover. Transparent areas of the mask define the shape the design is limited to and hides everything that lies under non-transparent parts of the mask.
Layers: 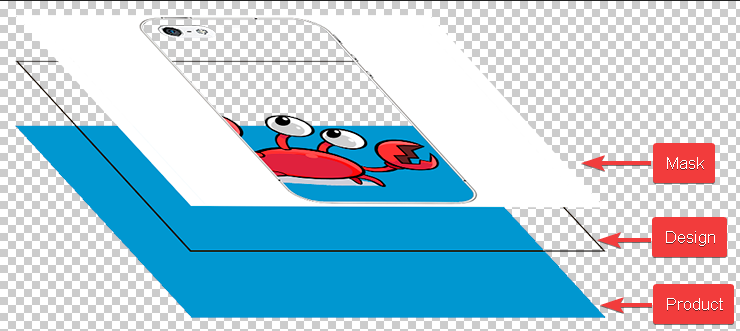
On the designer canvas: 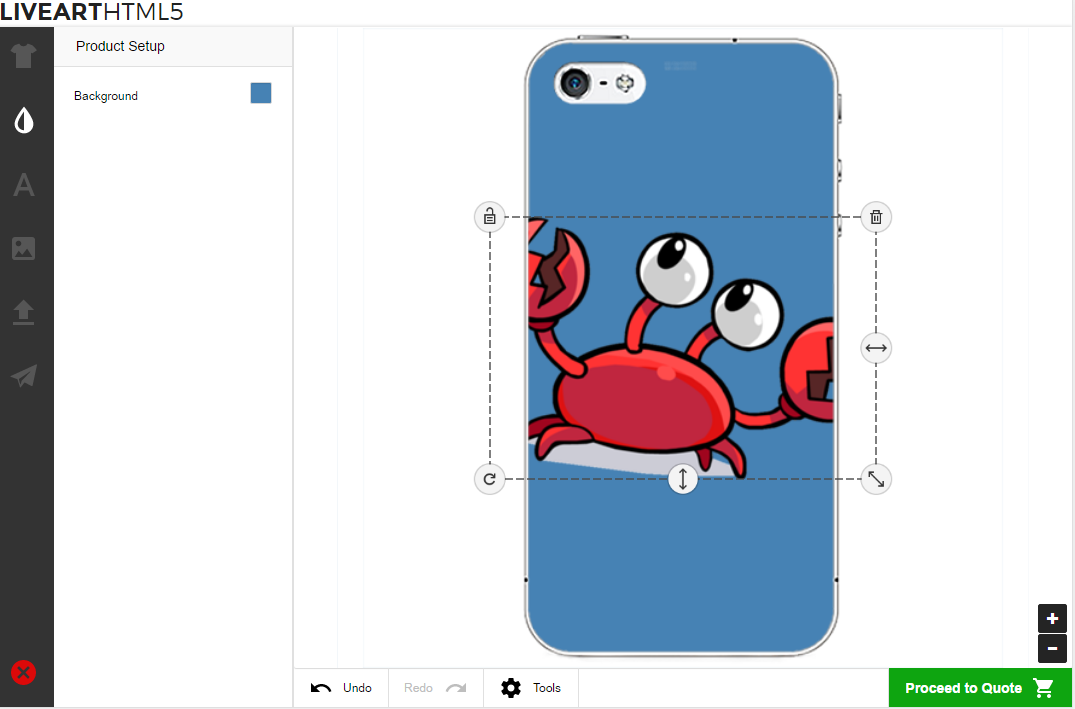
Example #2: Use a semi-transparent mask to make the product look more natural.
In this example product image is an SVG file with different colorizable areas. Mask serves to add to a flat image 3D-like appearance.
Layers: 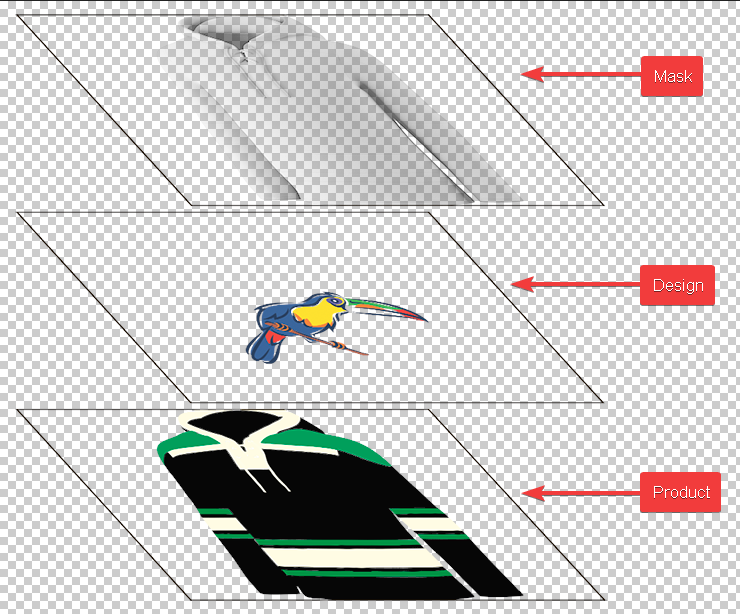
On the designer canvas: