Setup Product
To set up a specific type of product, welcome to refer to the following sections:
How to add a product
Main Setup
To start adding a product:
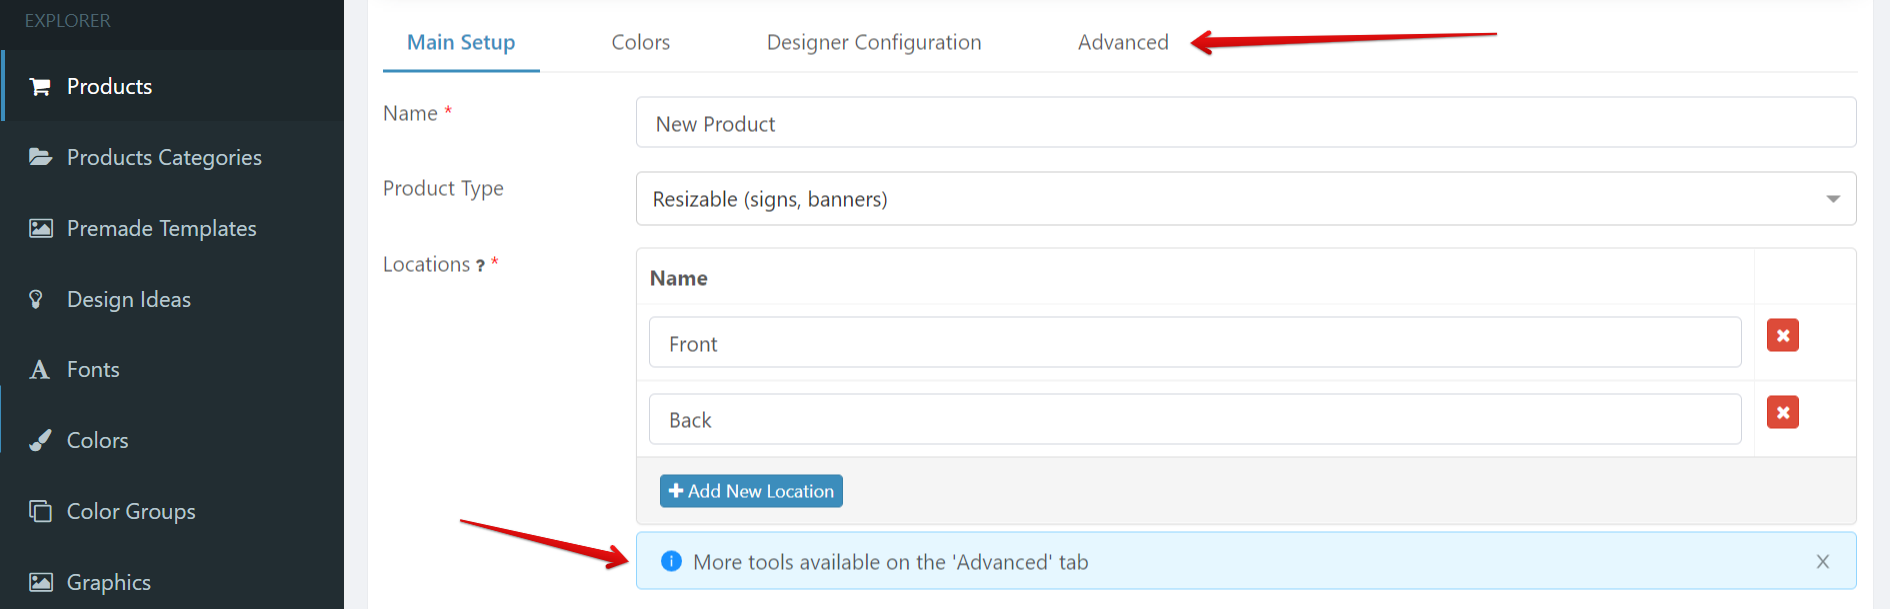
- Choose "Products" in the Explorer.

- Click on "Add new Product".

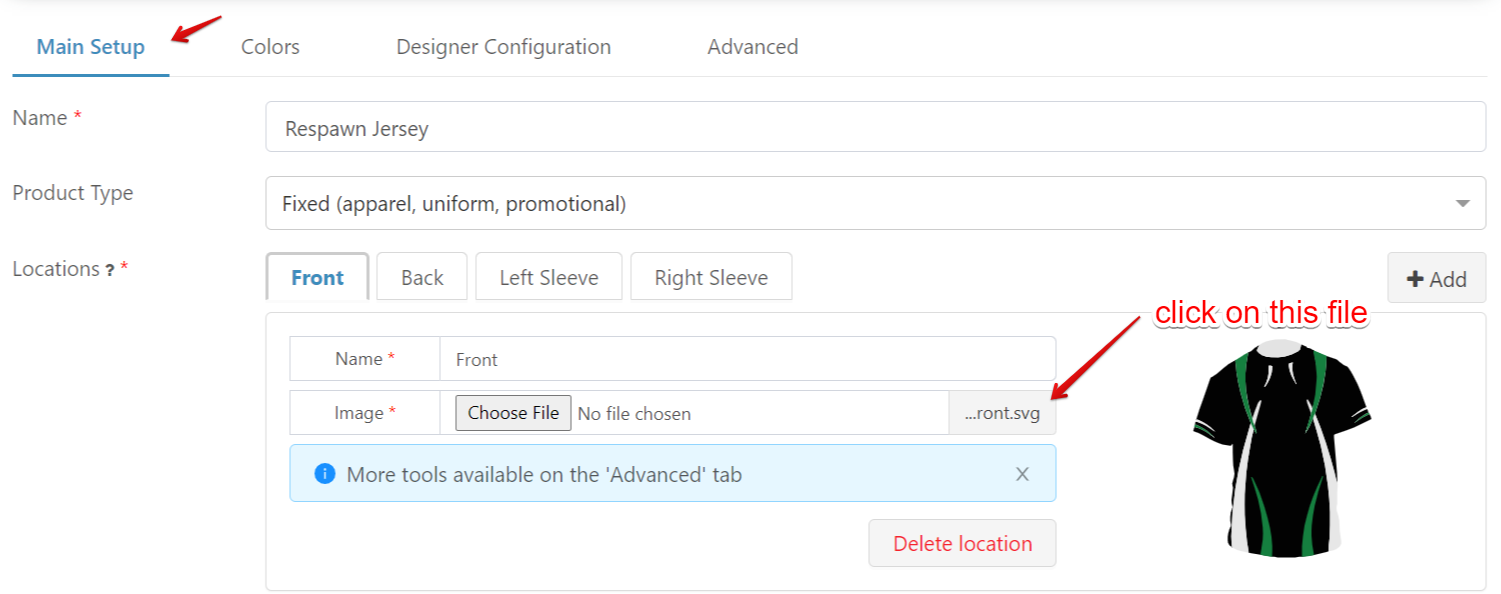
- Enter the Name of the product.

- Select the Product Type.
TIP
There are two product types, which determine the product characteristics inside the designer:
- Resizable - for signs, banners and decals. This type of product allows customers to change the product shape and size.
- Fixed - for uniforms, t-shirts and promotional products. This type of product allows customers to add Names/Numbers on the product, and colorize different segments. You can upload your own image that can be colorized, set up color groups and different locations.
Resizable Product
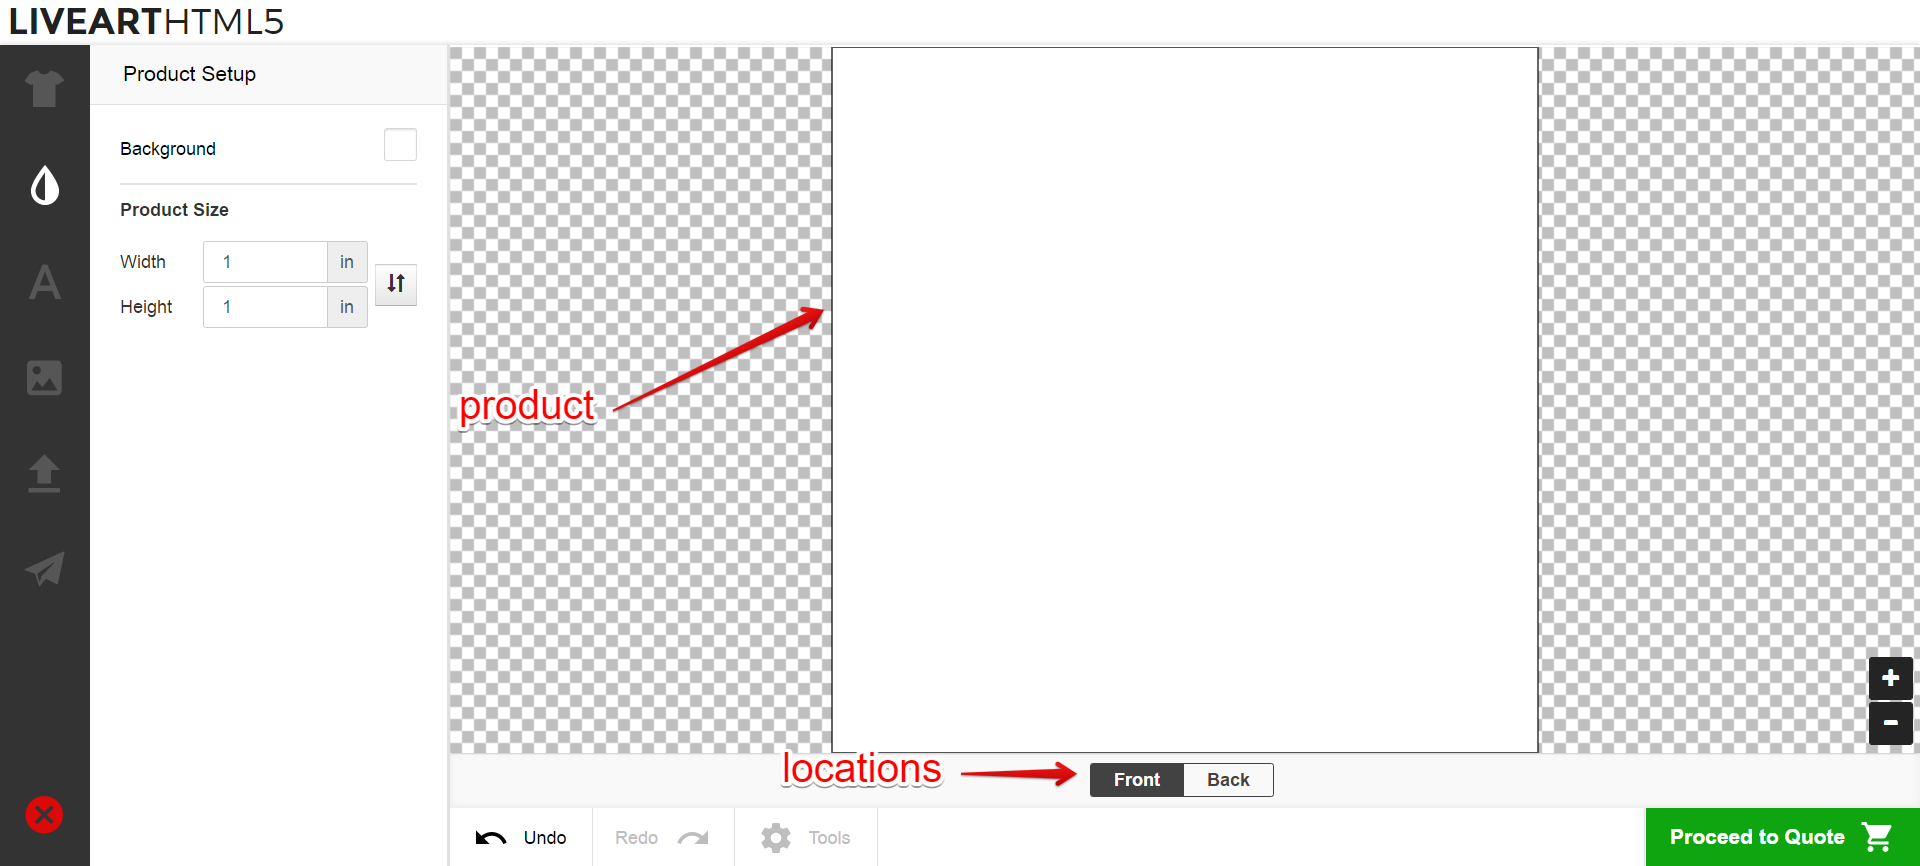
Add Locations. The admin area already has two default predefined locations for your product - Front and Back. For this product type, you do not need to upload any images, just update location's name. You can also delete any of them if your product has only one location. If you require more than two product locations, you can add them by clicking on "Add new Location".

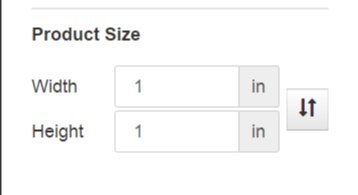
By default, product shape is a rectangle and will looks as follows in the designer:
In LiveArt, you can change product shape to Oval and configure product. That can be configured under the Advanced Tab.
Define Sizes.
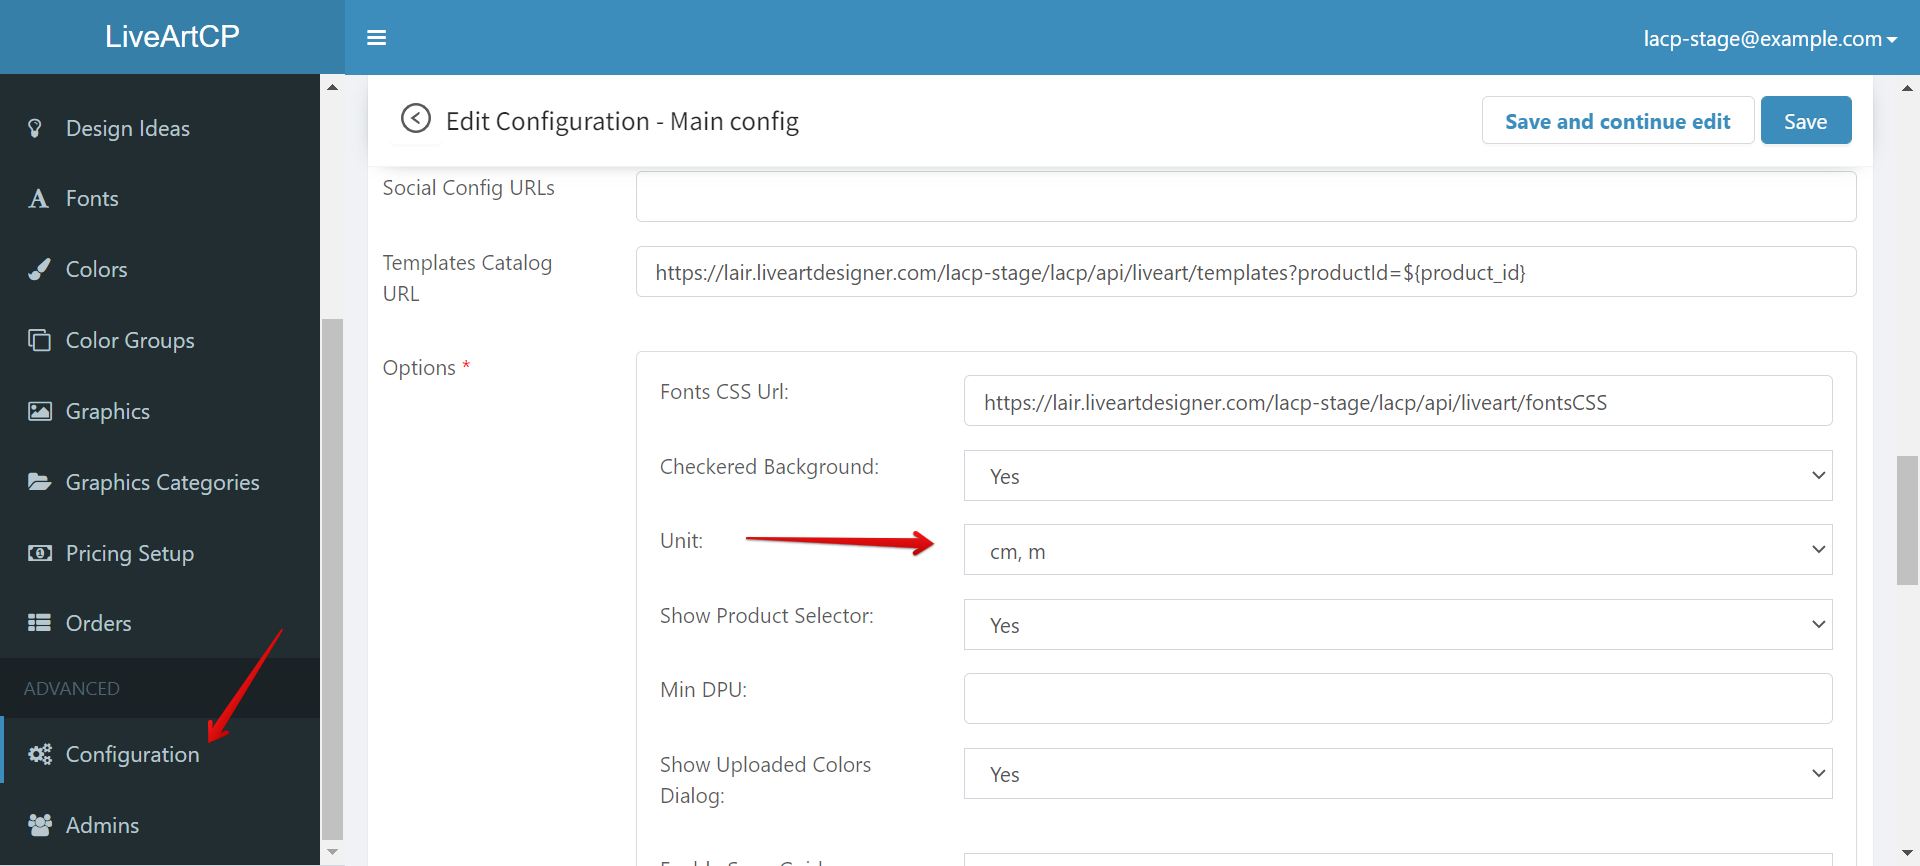
Default product units are inches. If you need to change them to cm please go to Configurations -> Main Config -> Options -> Unit:
- Default width and height. These are the real width and height of the product area.

The product will be loaded in the designer with these dimensions.
Select Size Type.
Free. The customer is free to change the product size but you can specify some limitations:
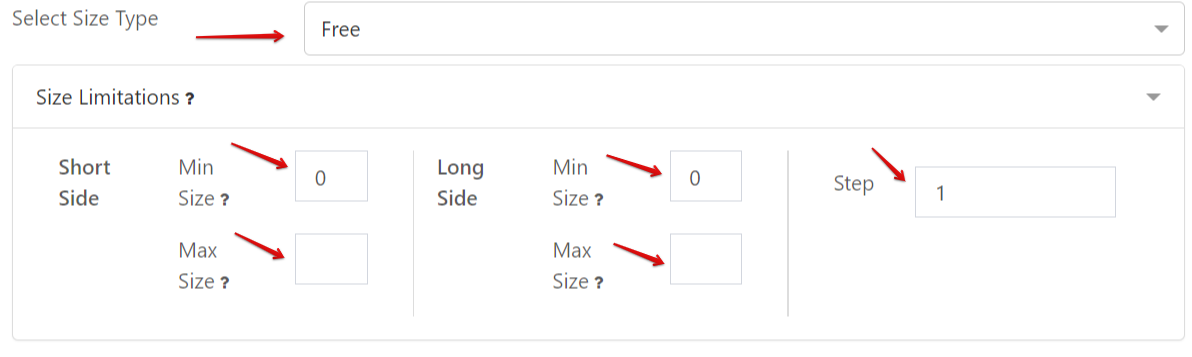
- Set Min Size and Max Size values for the short side meaning the width of the product. Blank value means size is unlimited.
- Set Min Size and Max Size values for the long side meaning the height of the product. Blank value means size is unlimited.
- Set Step - means with what step will the values change.
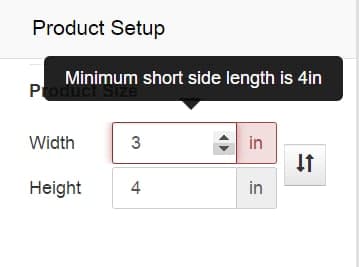
Free Size Type inside the designer:
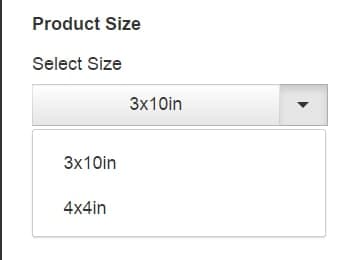
Fixed List - the customer will be able to select sizes from the list.
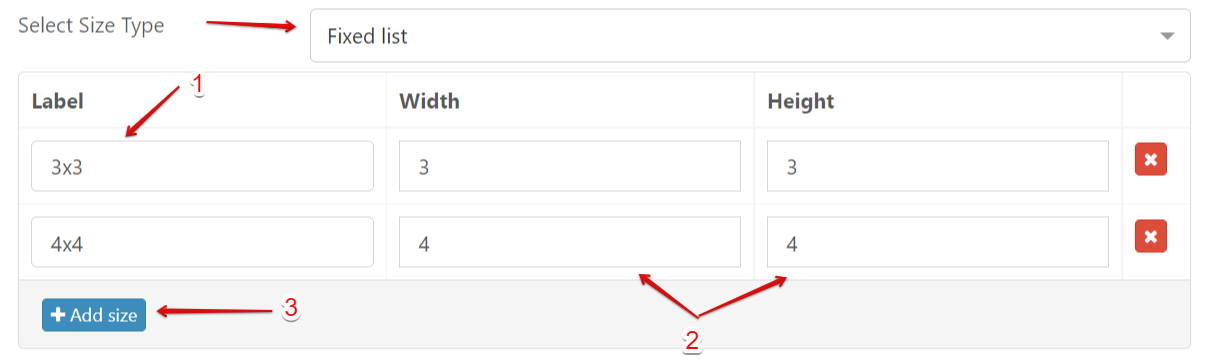
- Enter the Label of size - this is what the customer will be able to see in the designer.
- Enter the width and height of the product.
- You can add as many sizes as you want. You just need to click on "Add size" and create a new size.
TIP
- If you don't add any size - The product will be free resizable.
- If you add only one size - select will be hidden.
Fixed Size Type inside the designer:
No Resize - the customer will be unable to change the size of the product. The product will have default width and height.

Fixed Product
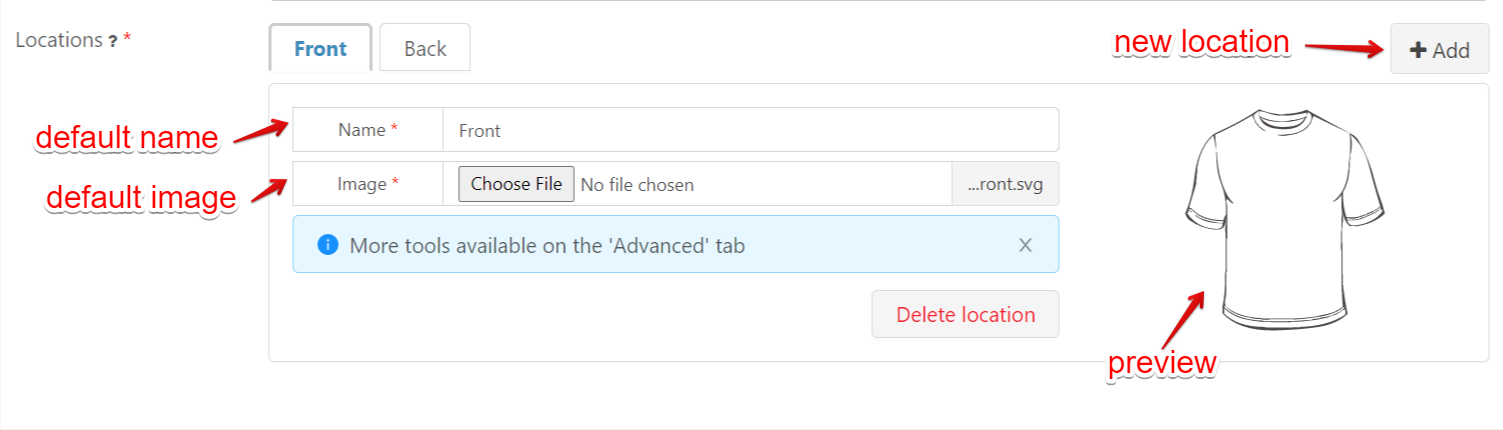
Add Locations. The admin area already has two default predefined locations for your product - Front and Back with T-shirt template uploaded. You can upload your own product template if you have and also change the default location name. If your product has more than two locations, you can easily add them.
If you require to allow users add designs to the specific editable area, you can configure it on the Advanced Tab. In case of Main Setup, editable area is the whole canvas.
If you would like your product template to be colorizable, please see detailed SVG product preparation guide.
Colors
You can find color configuration in the Colors tab at the top.

Resizable Product
To set up colors for a resizable product:
- Set product Colorizable status.

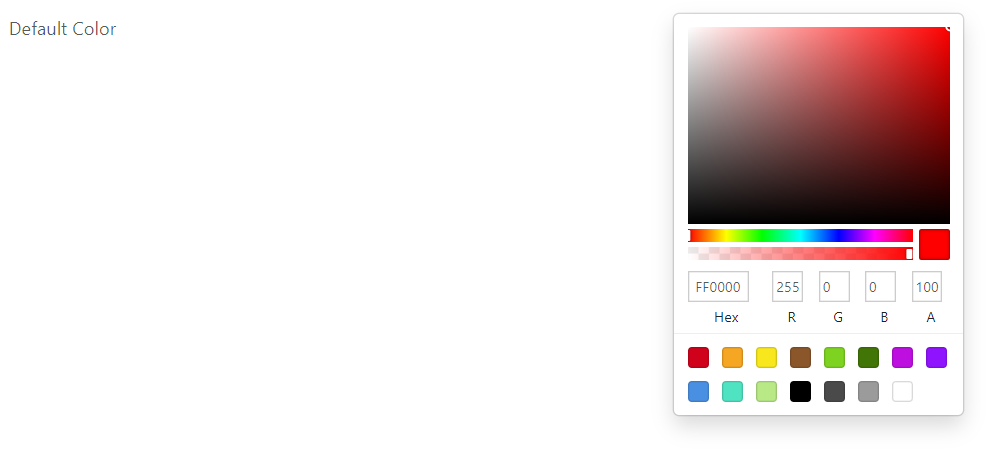
- If the product is set to be not Colorizable, set up the default product color.
- If the product is set to be Colorizable, select Color Source on the following panel

Add Individual Colors - you can individually add colors from all the available colors in the admin panel. You can see all the available colors and configure them in "Colors" in the Explorer. Leave input blank to use all the available colors.
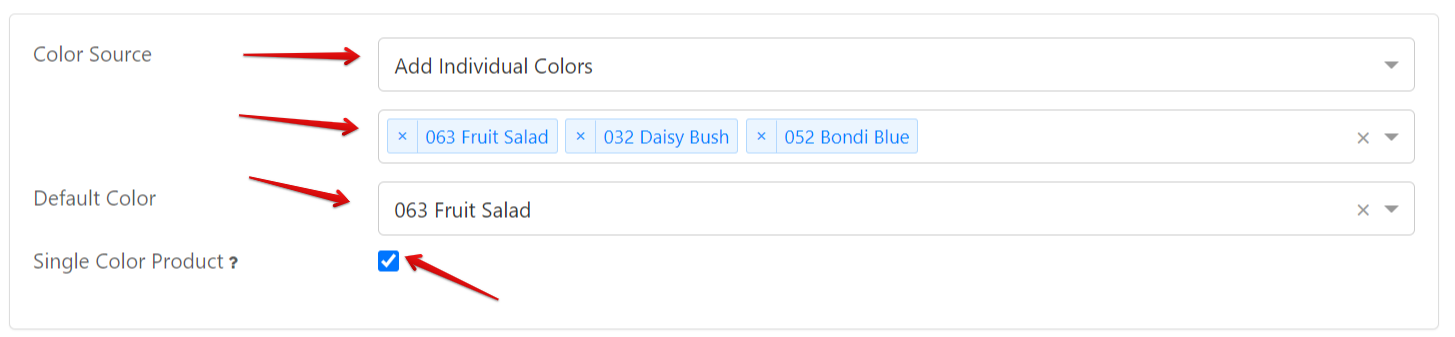
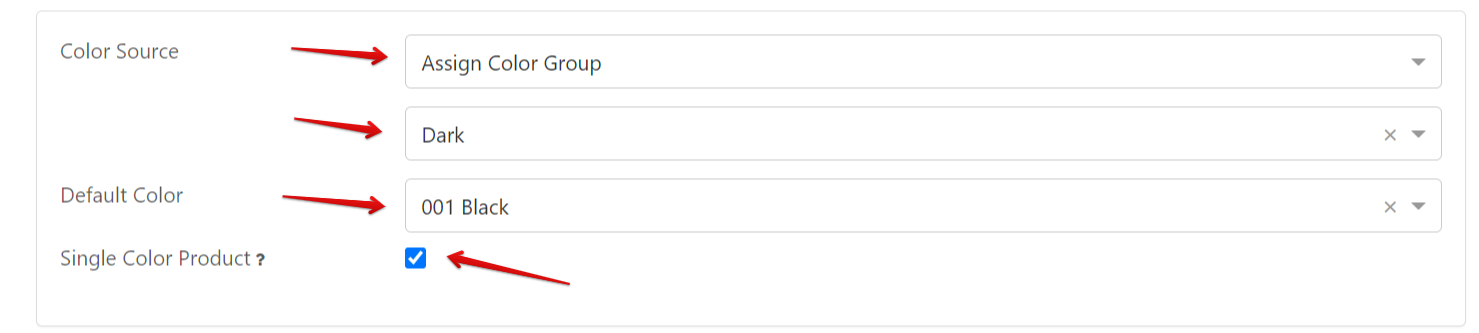
- Choose Default Color - the color in which the product background will be colorized by default.
- Set "Single Product Color" if you want to allow customers to apply the selected color to all locations.
Assign Color Group - you can select color group of the pop-up and all colors that are contained in selected color group will be available for product background. You can see all the available color groups and configure them in "Color Groups" in the Explorer.
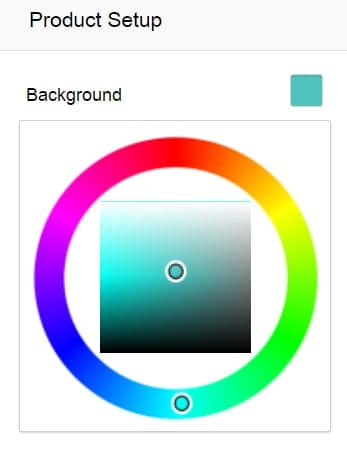
Color Wheel - you can enable a color wheel for better design experience.

Color wheel inside the designer:
 '
'
Fixed Product
To set up colors for fixed product:
- Select the Color Mode
One Color Picker. You can use this mode, if you do not have vector product templates but have separate PNG or JPG images for every product color.
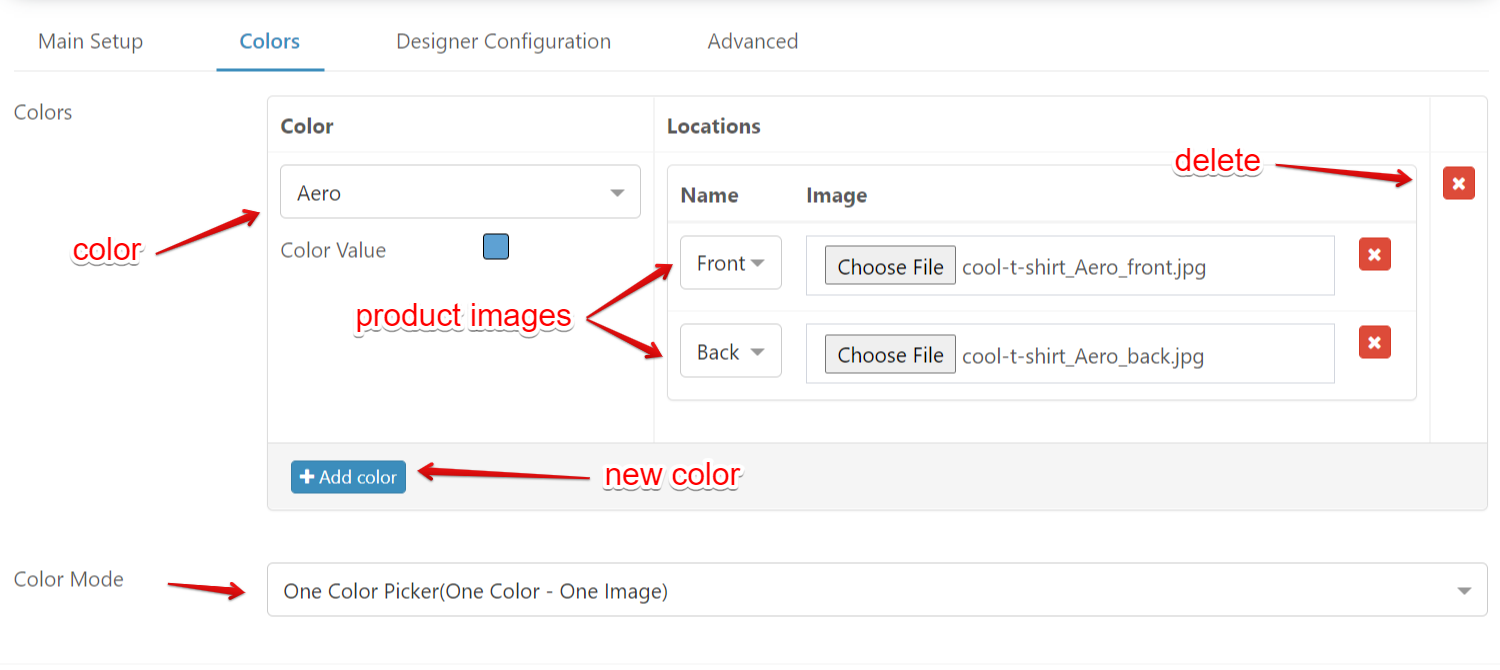
- Select Color from all the available colors in the admin panel. You can see all the available colors and configure them in "Colors" in the Explorer.
- Select the Name of the available Locations.
- Upload an image of the location you have chosen.
- You can add as many colors as you need, just click on "Add color".
TIP
Supported image formats are .jpg, .gif, .png, .svg, .webp
Maximum image size is 16MB. We recommend using images under 500KB for better performance.
Images are not downscaled automatically.
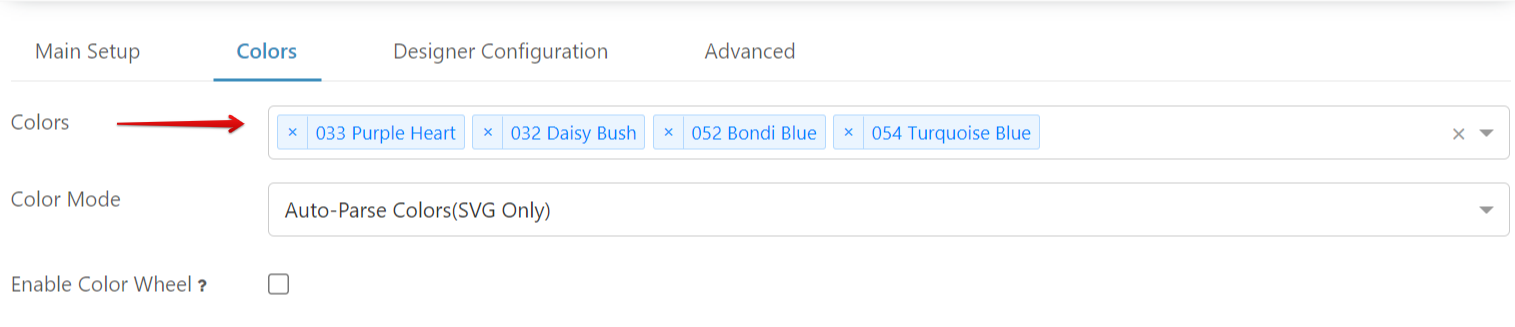
Auto-Parse Colors. This feature works for SVG product templates only. LiveArt will automatically parse product template by sub-areas which can be colorized by colors you select for this mode.

- Color Wheel - you can enable a color wheel for better design experience.
Color wheel inside the designer:
- If you do not want to use the color wheel and want to add colors manually you can select the desired colors available in admin panel. You can see all the available colors and configure them in "Colors" in the Explorer.
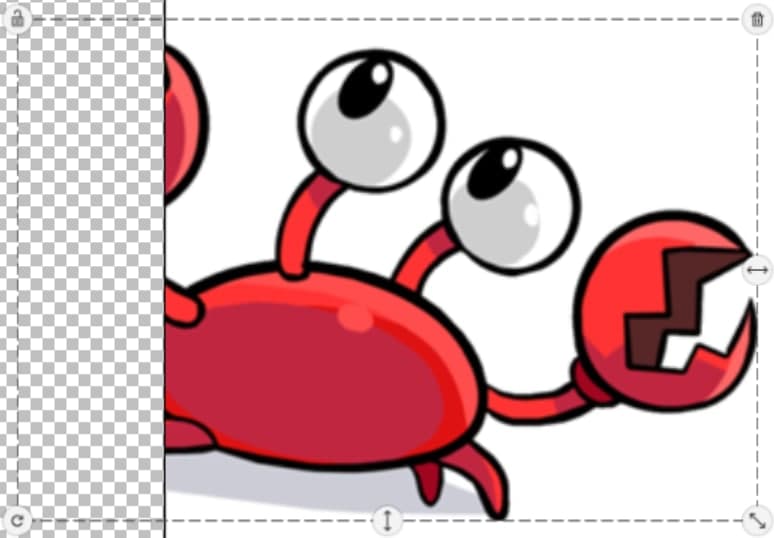
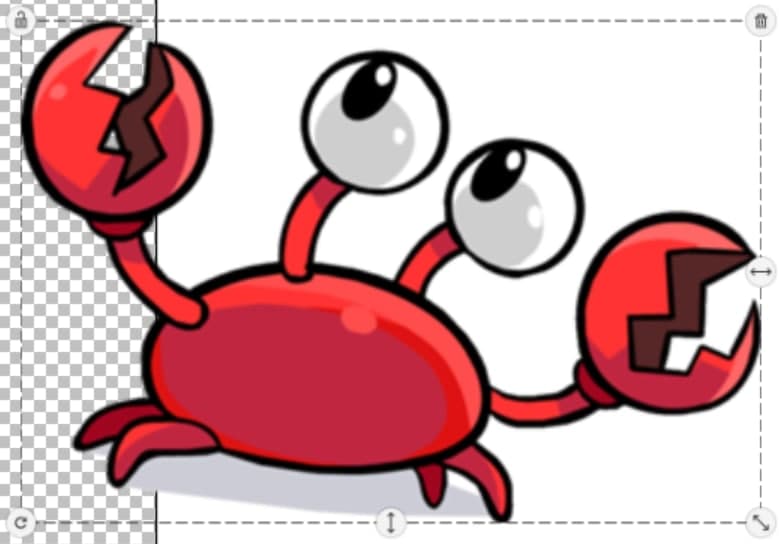
Configure Color Areas - you can manually select a set of colors for separate product areas. You will need to use query to configure color areas. To find the query:
- Click on Image file that represents the location:
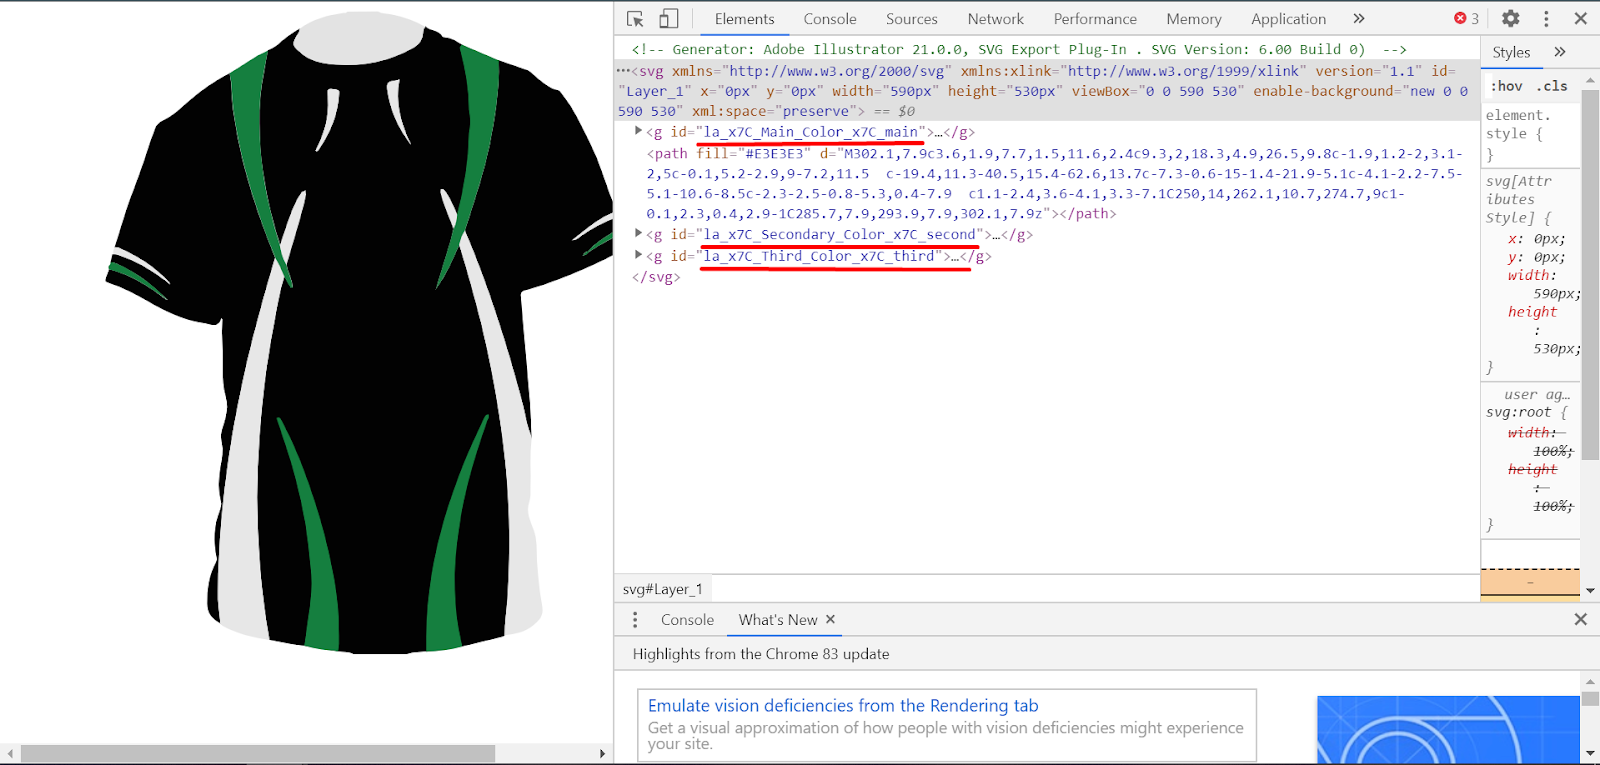
- Click on the right mouse button and choose Inspect. Copy colorizable area id and paste it into the Query. For example, this product has three colorizable areas so that you can apply colors for these areas respectively.
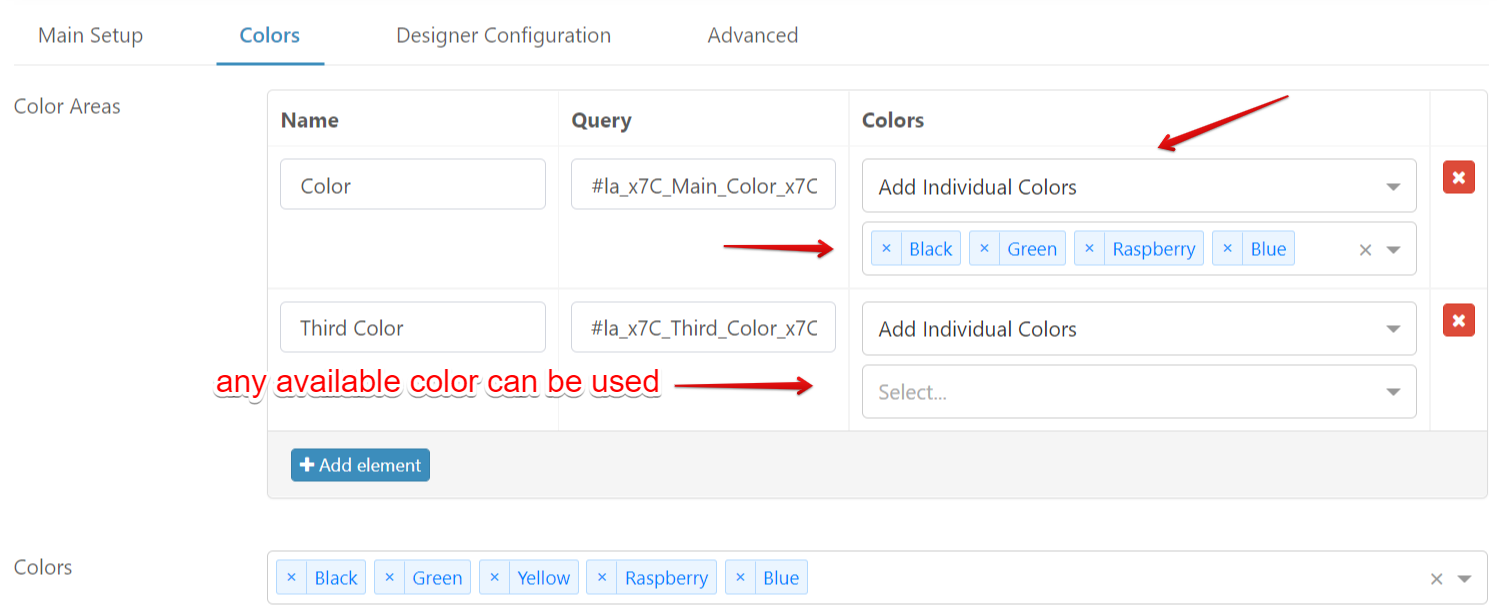
Get back to "Colors" Tab and proceed with:
- Enter the Name of the area.
- Enter the Query - a CSS id of the image element which you copied previously from the SVG file.

Configure colors for each respective area:
- Add Individual Colors - you can individually add colors for from all the available colors in the admin panel. You can see all the available colors and configure them in "Colors" in the Explorer. Leave input blank to use all the available colors.
- Assign Color Group - you can select color group of the pop-up and all colors that are contained in selected color group will be available for product background. You can see all the available color groups and configure them in "Color Groups" in the Explorer.

- Color Wheel - you can enable a color wheel for better design experience.

Designer Configuration
You can configure designer behavior for the particular product inside the Designer Configuration tab.

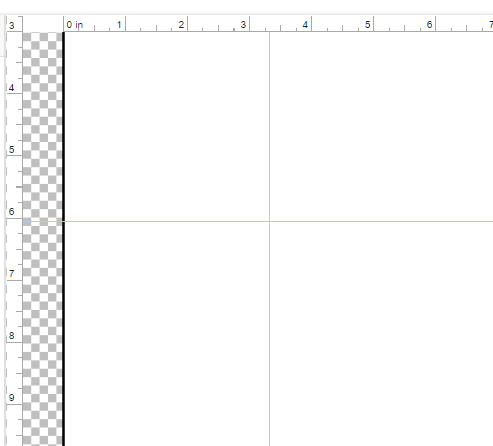
- Show ruler to show product coordinates depending on its size.

Please see how the ruler looks in the designer:
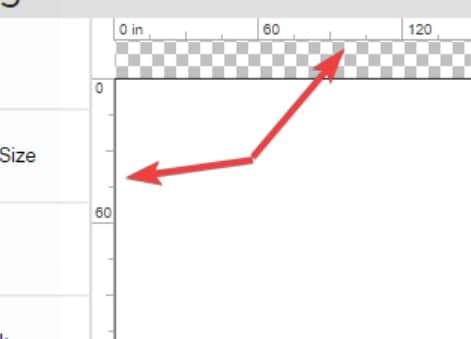
Additionally you can use guidelines for precise editing and object snapping. To add them, click on the ruler and drag your mouse onto the product.
- Enable copy to back to enable copy objects to the second location.
TIP
Copy to back copies only the editable elements, meaning that the background is not being copied.
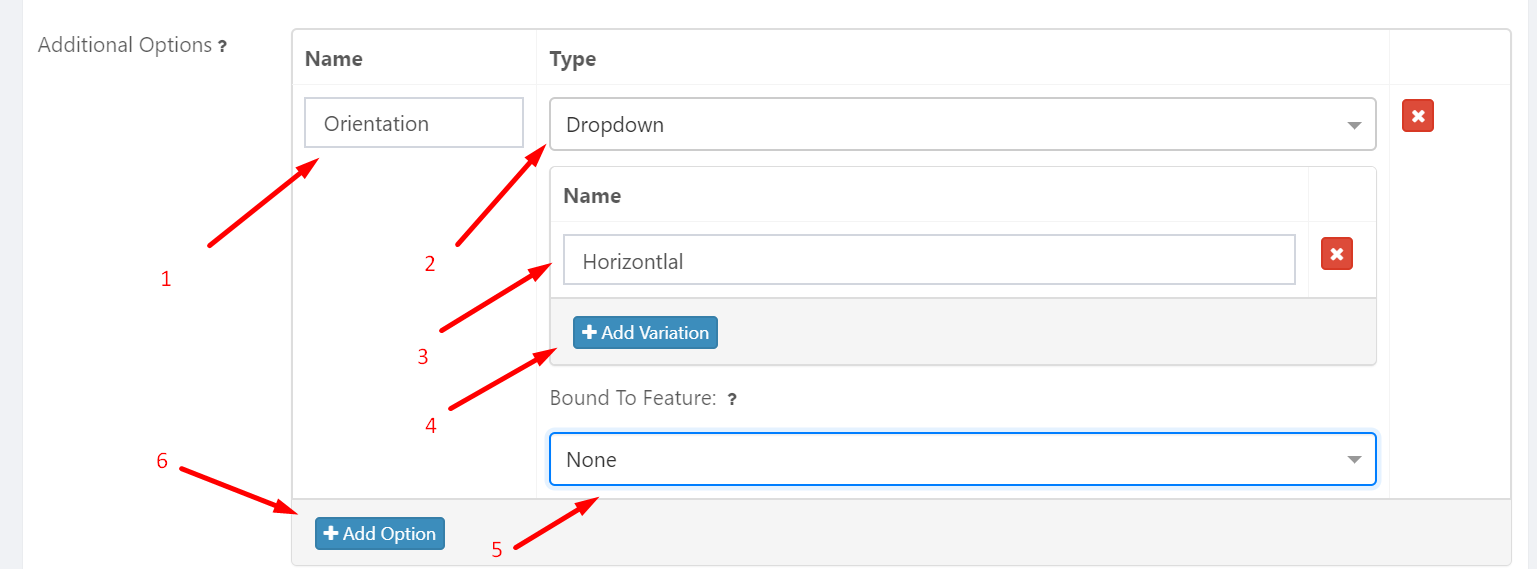
Add additional options ( Additional product options like materials, orientation and etc.):
Enter the Name of an additional option.
Select type:
Dropdown - the customer will be able to choose only one option variation.
Checkbox - the customer will be able to select multiple option variations.
Add variations' Names.
You can add as many option variations as you want, just click on "Add Variation".
Choose "Bound to Feature" if appropriate. This means that selecting an option will affect product visualization or limitations of some decoration features. For example, you can choose "Enable Back" and bind this feature to the variation name. Then second (Back) location will be visible for this variation. If you do not bind "Enable Back" feature to the variation name there will be visible only Front location. Thus, you can make visible Front and Back location or only Front location according to specific variation.
You can add as many options as you want, just click on "Add Option".
Fixed Product
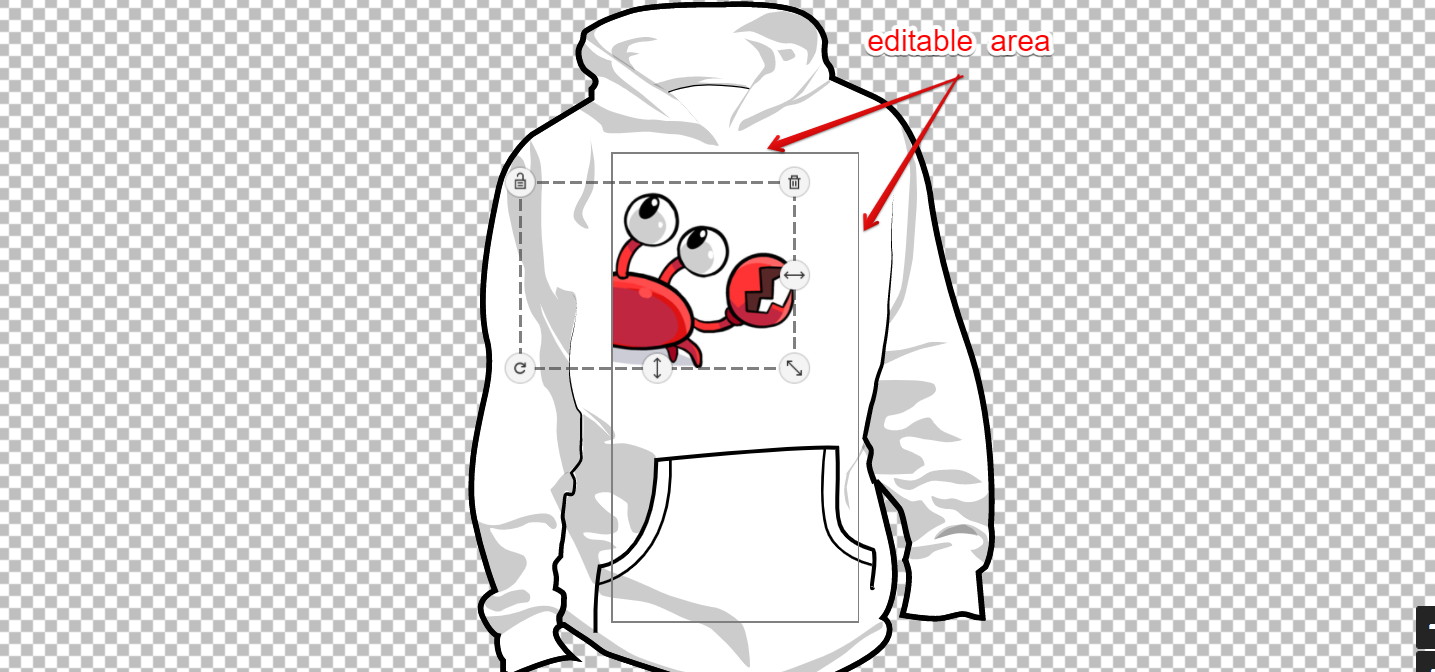
- Enable Hide Editable Area Border if you want to hide the editable area border on the product template for the customers.
If you leave this feature disabled, the customer will see the following:
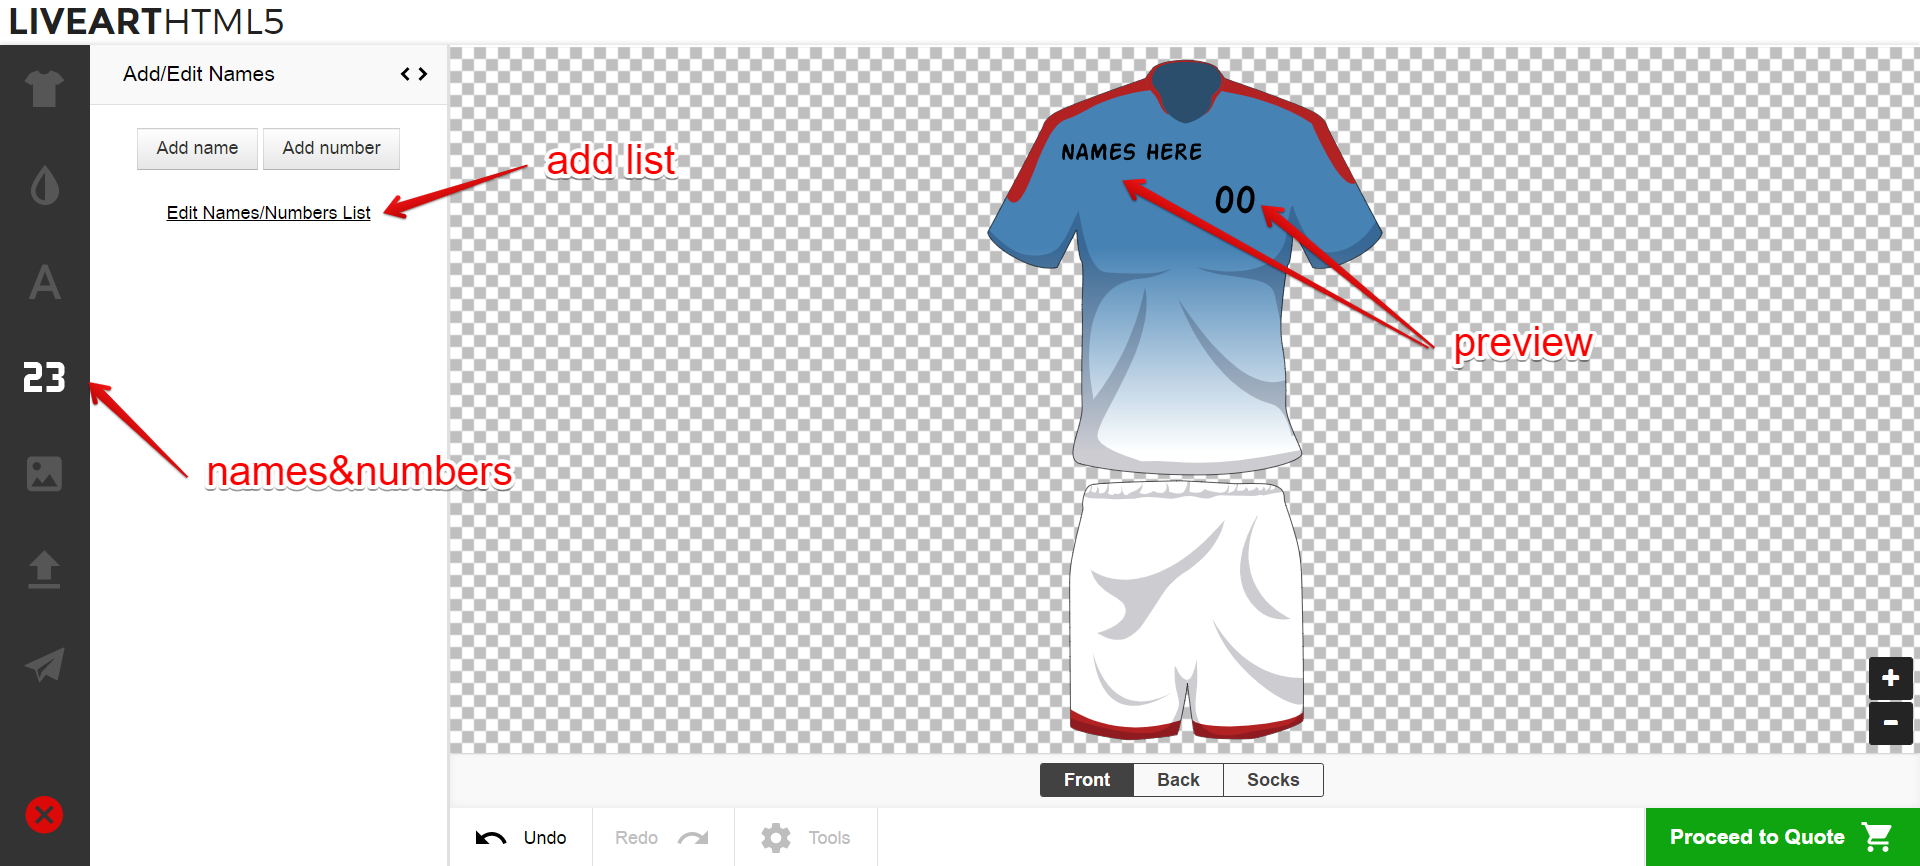
Enable Names/Numbers so that the customer will be able to add names and numbers to the product template.
Advanced
To apply advanced configurations:
- Upload the thumbnail (reduced-size version of the image). We recommend using a raster image 110x110px maximum. If the image proportions are larger the image will be automatically resized to fit the 110x110px. Supported image formats are .jpg, .gif, .png, .svg, .webp.

- Select category from the list of categories. You can choose multiple categories and the Product will be present in these chosen categories.

- Select a default template. This is the template that will be loaded for this Product by default, it should be created and configured at "Premade templates" (see "How to create premade templates"). When you open a product in the designer premade template design will be available for this product.

- Enter the description (short description of the product, visible to the end-user).

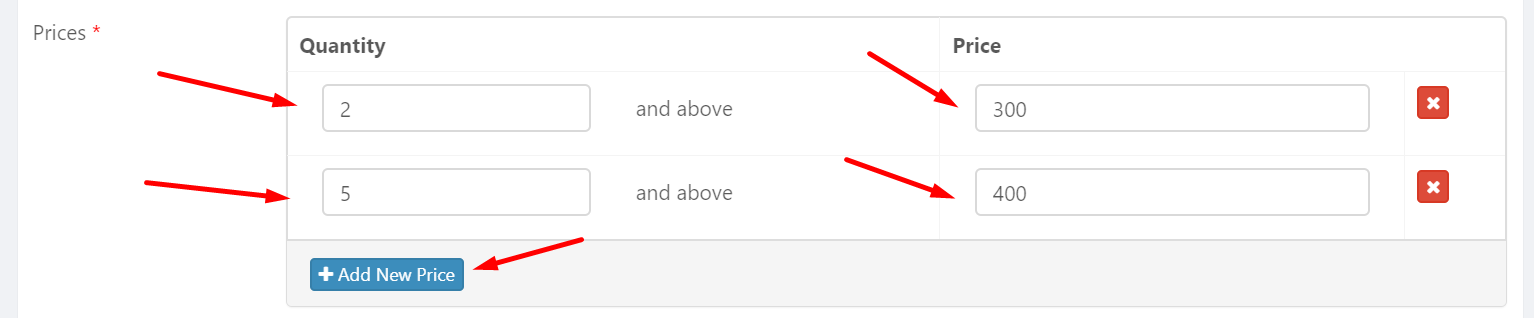
- Enter price information. Enter the quantity of the product for which you want to set a fixed price, and set the price for the quantity you entered. You can add multiple prices by clicking on "Add new price".
- Select a pricing rule. Pricing rule can be created at "Pricing Setup" (See "How to add a pricing rule"). Pricing rules are useful if you want pricing to depend on numbers of colors applied to the design, graphic sizes or the design sizes.

Add restrictions for images:
Enter "Min DPU" value - the warning message will be shown if the customer will size raster image more than safe dimensions to meet suggested print quality standards.
Min Quantity - enter the minimum quantity of the ordered product. If the customer will try to order less product quantity than you entered, the order will not be placed.

Resizable Product
- Configure Locations
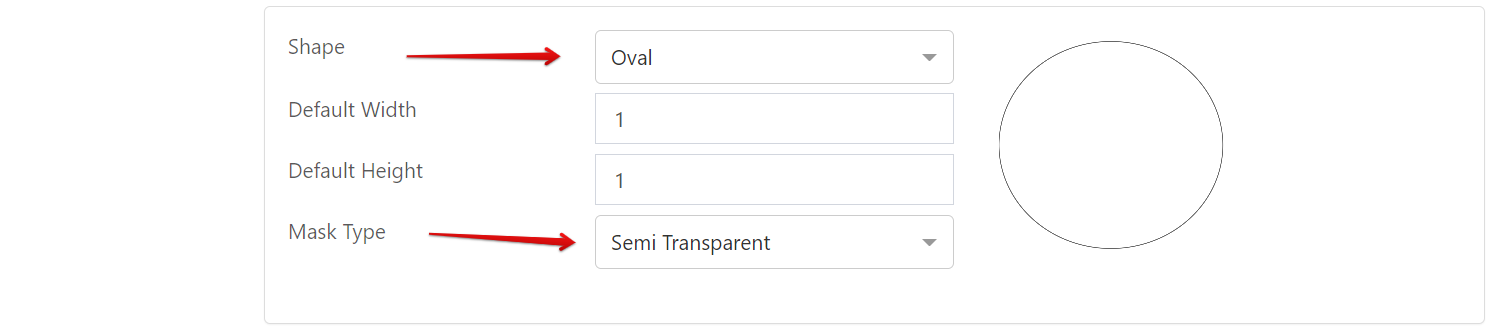
- Choose the shape of the product. You are able to choose two shapes: Rectangle or Oval. Oval shape can be applied to products such as stickers.
- Select type:
- Semi-Transparent - the whole or part of the design that will be added beyond the product area will be visible as semi-transparent.
- Cut - the whole or part of the design that will be added beyond the product area will be cutted and not visible.
- No - design can be visible and added on the product and beyond the product area.
- Semi-Transparent - the whole or part of the design that will be added beyond the product area will be visible as semi-transparent.
Fixed Product
Configure Locations
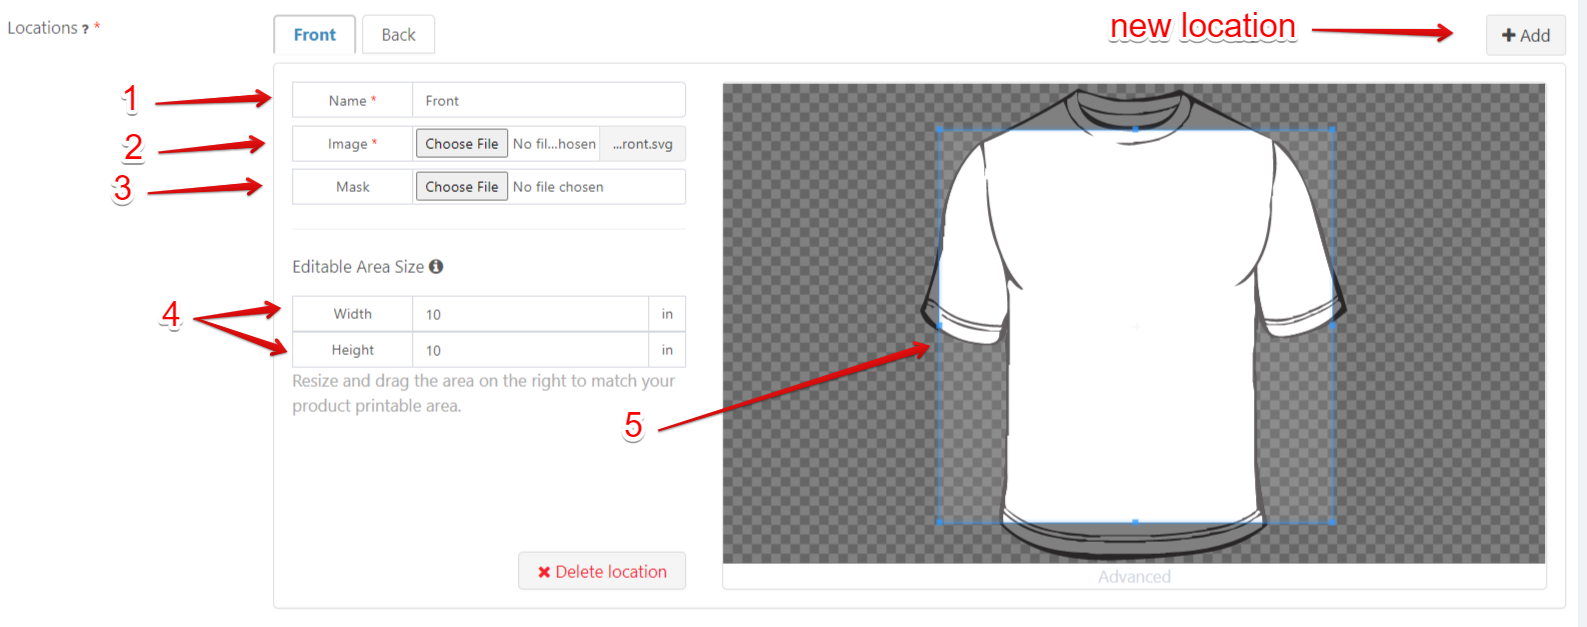
- Enter the name of the location.
- Upload the product image.
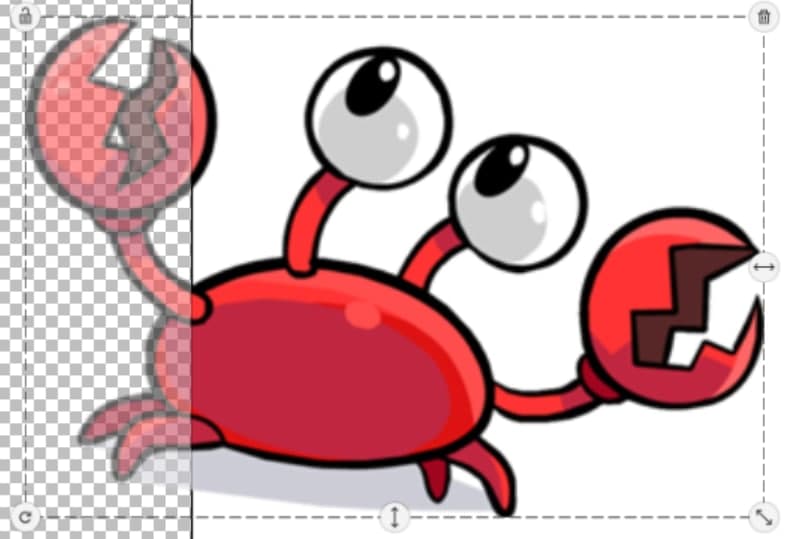
- Upload a mask (optional). This a picture that covers the main image to make visible only the required area that can be customized.
- Enter editable area sizes - real width and height of the editable area.
- You can resize and drag the area on the right to match your product printable area.
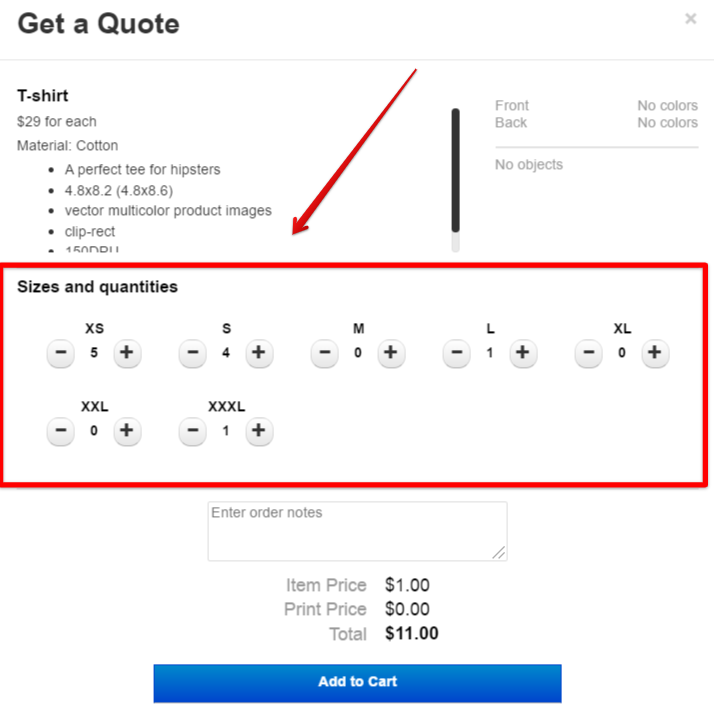
Setup Sizes. You can set all sizes the specific product has. Also, you can enter the product size that is not listed and it will be automatically added to list. Customers will be able to order those sizes you set in the admin panel.

In the designer this will look as follows: